DHT11 with ESP32 DevBoard
Introduction
This tutorial will guide you through interfacing a DHT11 temperature and humidity sensor with an ESP32 DevBoard. You’ll learn how to wire the sensor, install the necessary library, and upload test code to Arduino.
The DHT11 is a low-cost digital sensor for measuring temperature and humidity. When paired with an ESP32 DevBoard, it can feed real-time environmental data into your sensor projects. By the end of this tutorial, you’ll be able to:
- Read temperature (°C and °F) and humidity (%) from a DHT11 sensor
- Display readings via the Serial Monitor
Materials Needed
- ESP32 DevBoard
- DHT11 Sensor Module (with 3 pins: VCC, GND, Data)
- Male-to-Female Jumper Wires (3×)
- Computer with Arduino IDE installed
Wiring
We need to connect the DHT11 to the DevBoard, follow this wiring:
- DHT11 Vcc → 3V3
- DHT11 Ground → GND
- DHT11 Signal → GPIO21
As illustrated in this picture: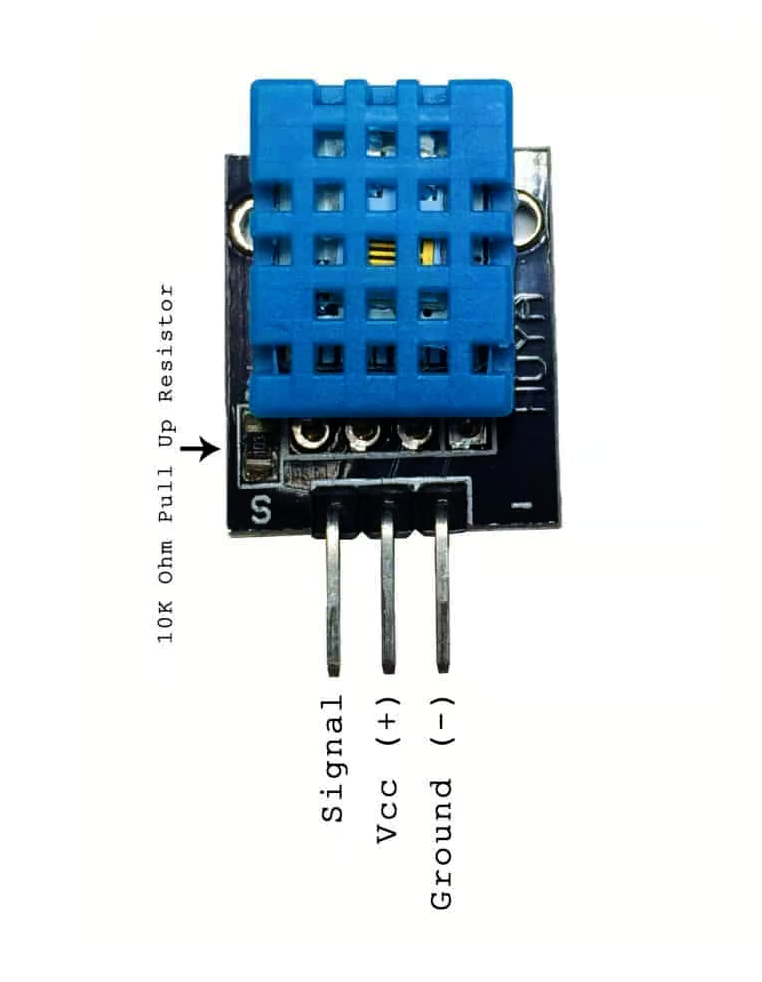
Your wiring should look like this: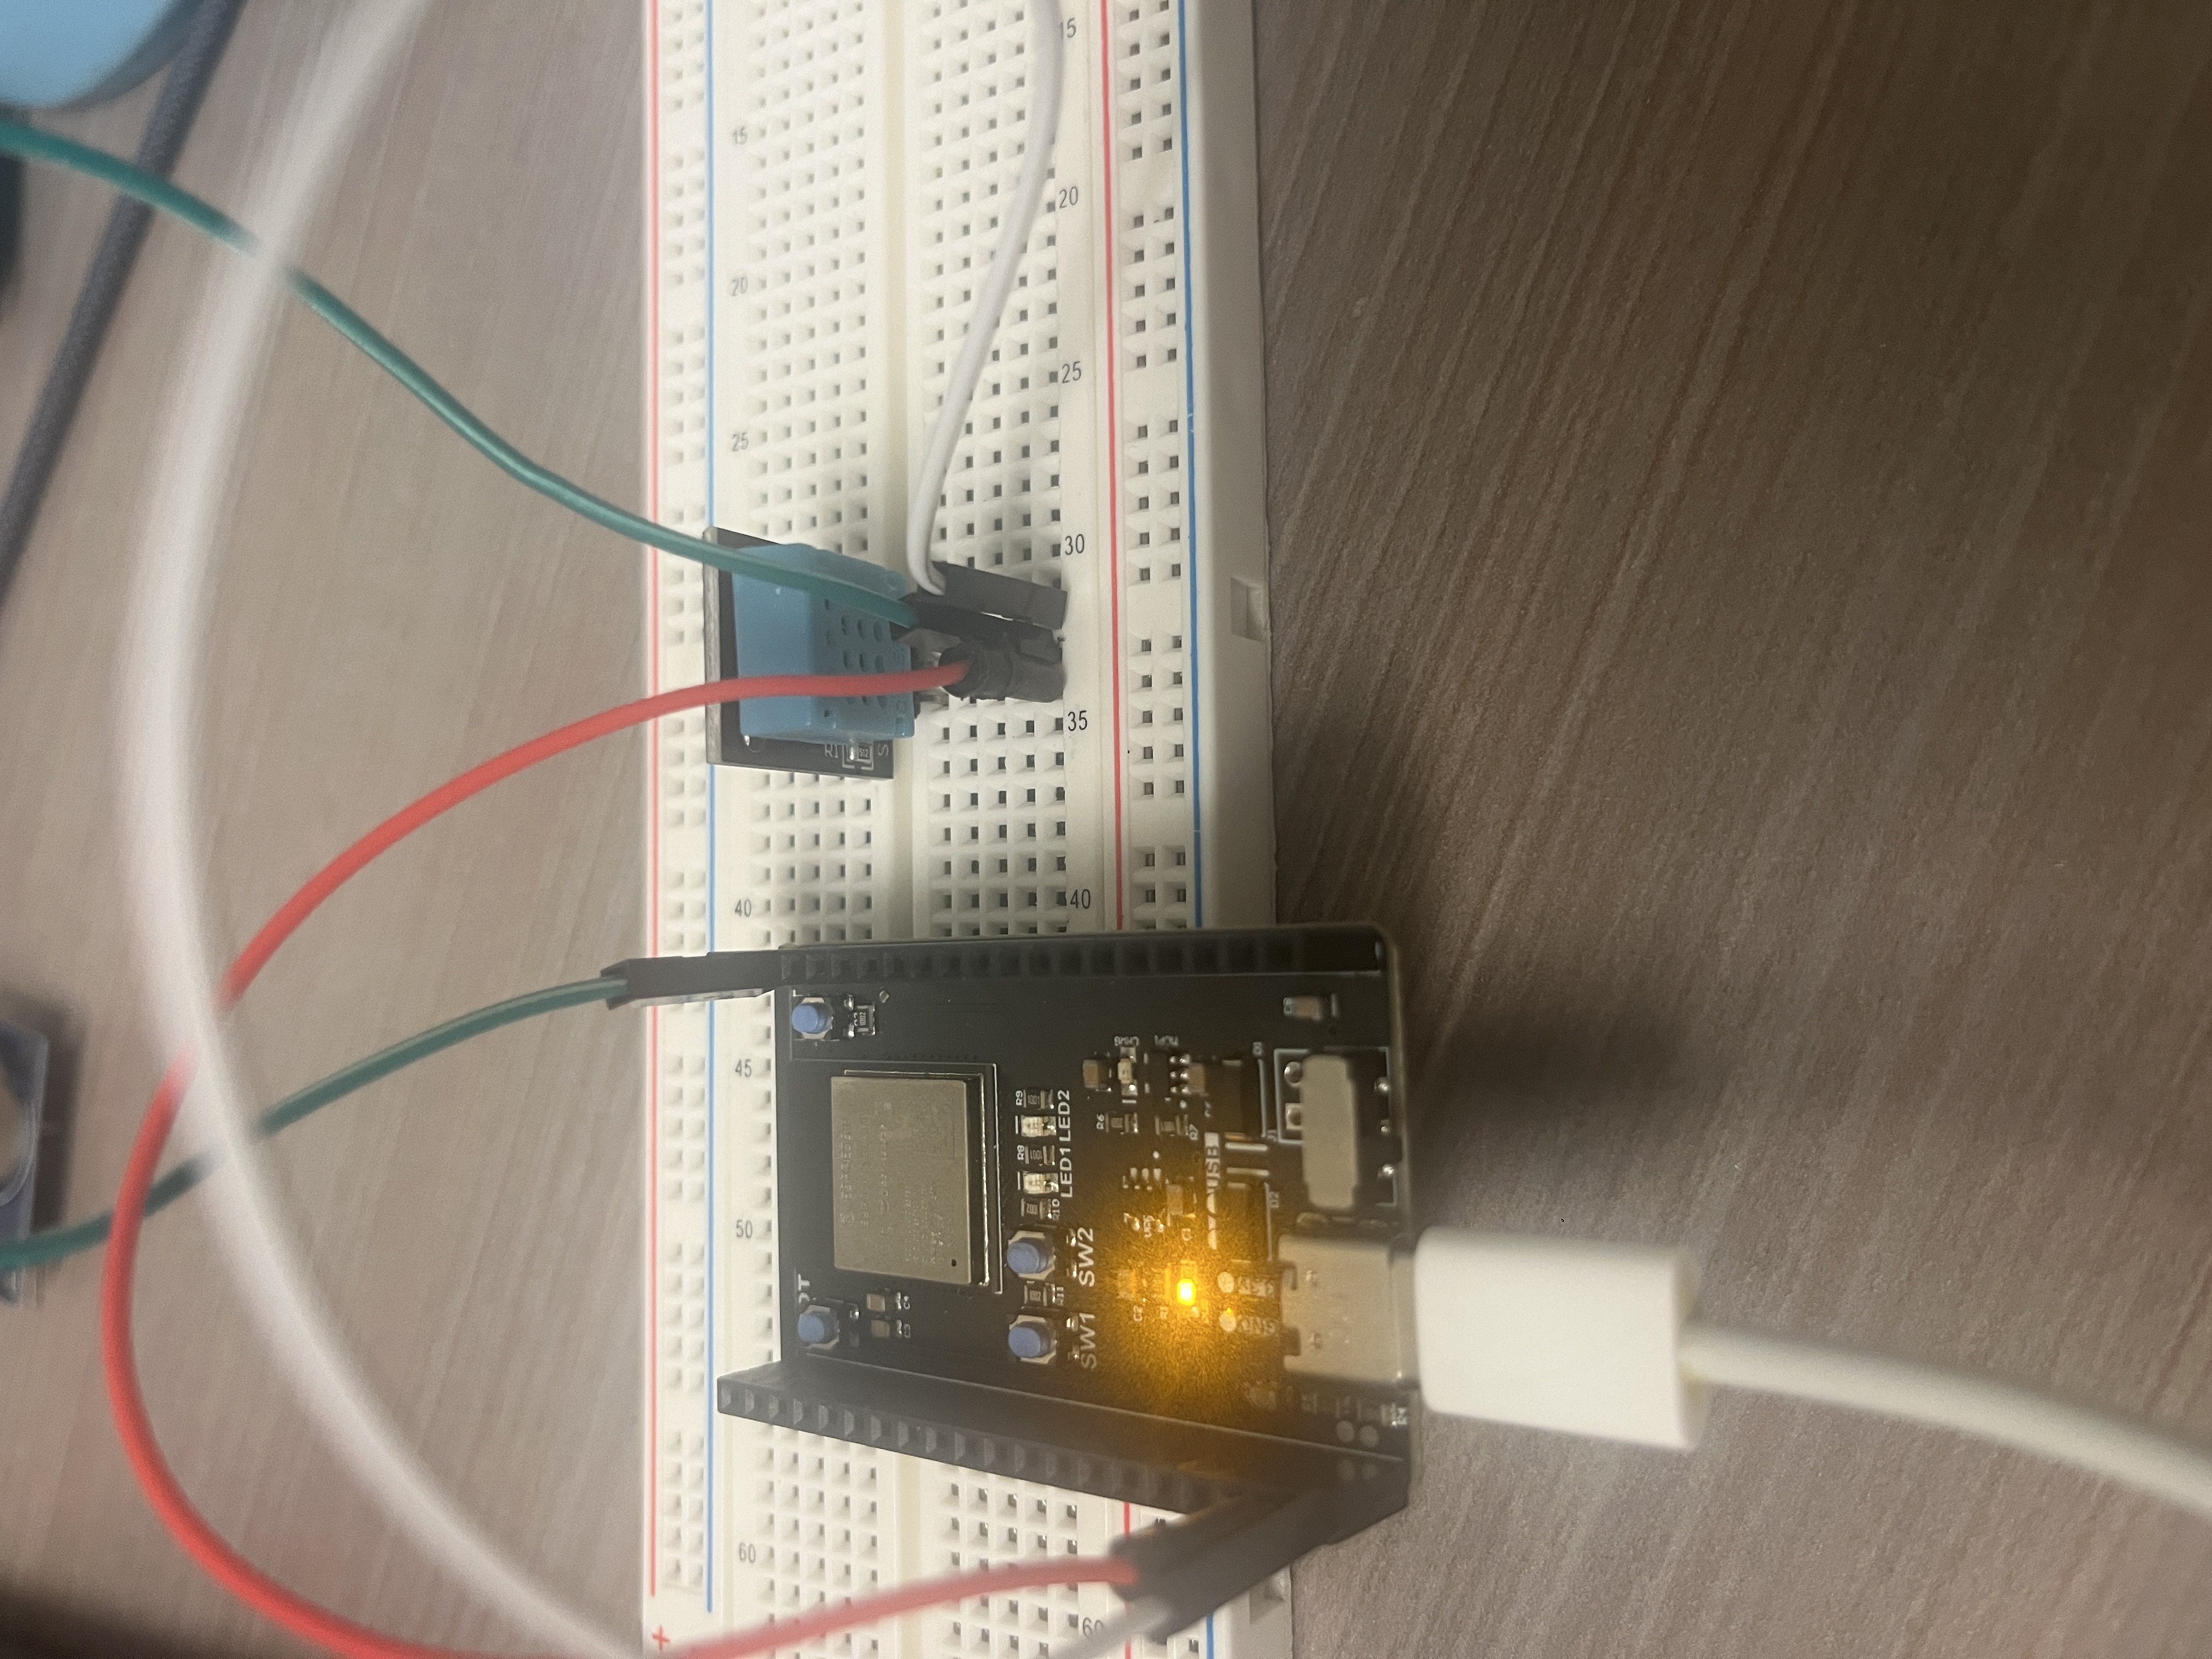
NOTE: There are two different models of DHT11. Do not follow the wiring in the picture below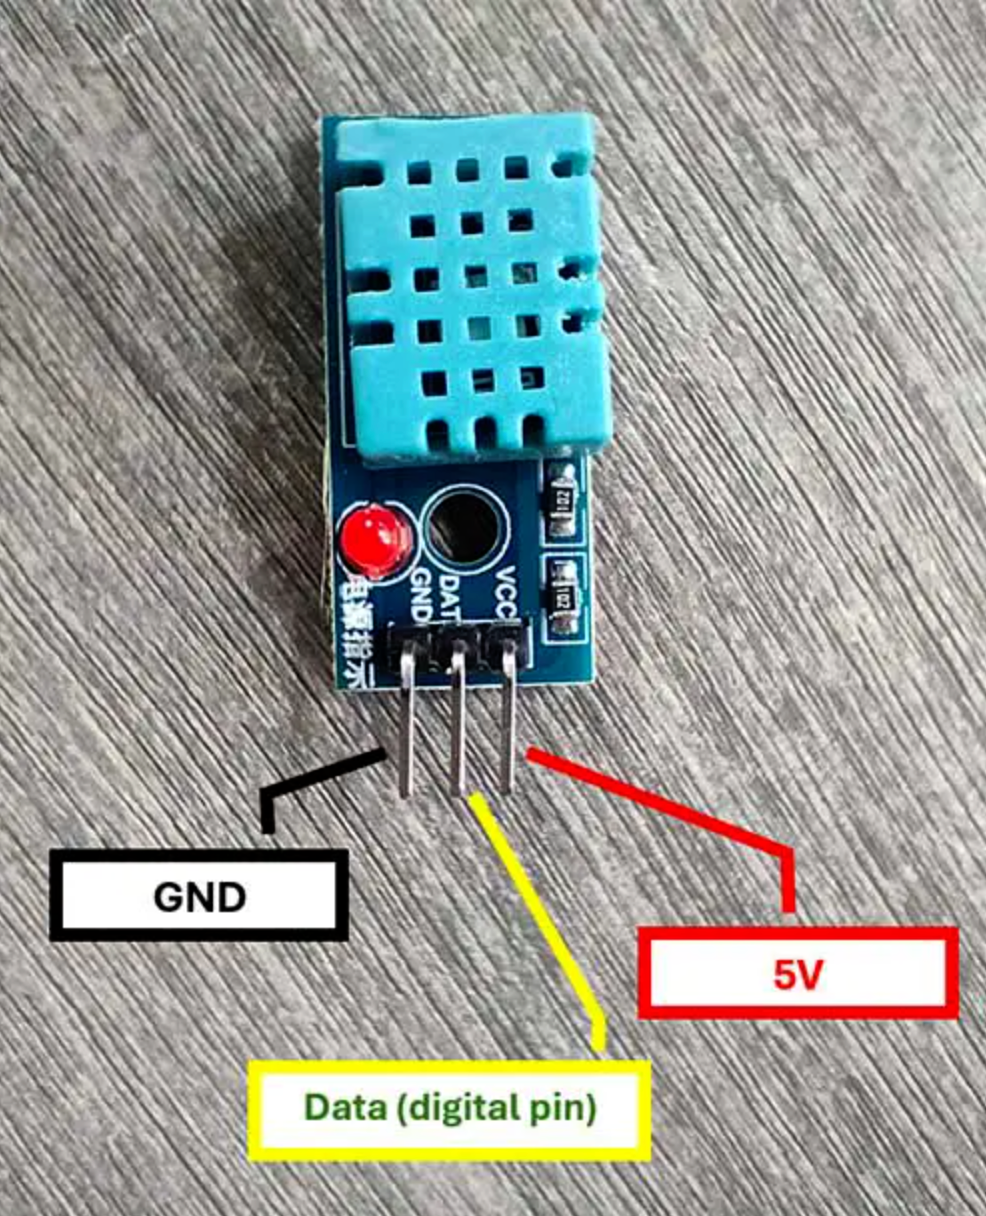
Connect ESP32 DevBoard
- Open the Arduino IDE
- Select the new port after you connect your computer to the ESP32 DevBoard
- For your board, select “ESP32 Dev Module”
- Now you are ready to upload your code!
Installing the DHT Library
But before we write and upload our code, we need to add a library
- Go to Sketch → Include Library → Manage Libraries…
- In the Library Manager, search for “DHT sensor library” by Adafruit
- Click Install all
Code
Now, upload this code to Arduino
#include <DHT.h>
#define DHT_SENSOR_PIN  21 // ESP32 pin GPIO21 connected to DHT11 sensor
#define DHT_SENSOR_TYPE DHT11

DHT dht_sensor(DHT_SENSOR_PIN, DHT_SENSOR_TYPE);

void setup() {
  Serial.begin(9600);
  dht_sensor.begin(); // initialize the DHT sensor
}

void loop() {
  // read humidity
  float humi  = dht_sensor.readHumidity();
  // read temperature in Celsius
  float tempC = dht_sensor.readTemperature();
  // read temperature in Fahrenheit
  float tempF = dht_sensor.readTemperature(true);

  // check whether the reading is successful or not
  if ( isnan(tempC) || isnan(tempF) || isnan(humi)) {
    Serial.println("Failed to read from DHT sensor!");
  } else {
    Serial.print("Humidity: ");
    Serial.print(humi);
    Serial.print("%");

    Serial.print("  |  ");

    Serial.print("Temperature: ");
    Serial.print(tempC);
    Serial.print("°C  ~  ");
    Serial.print(tempF);
    Serial.println("°F");
  }

  // wait a 2 seconds between readings
  delay(2000);
}
Select tools, then click Serial Monitor. This is the format you should expect to see: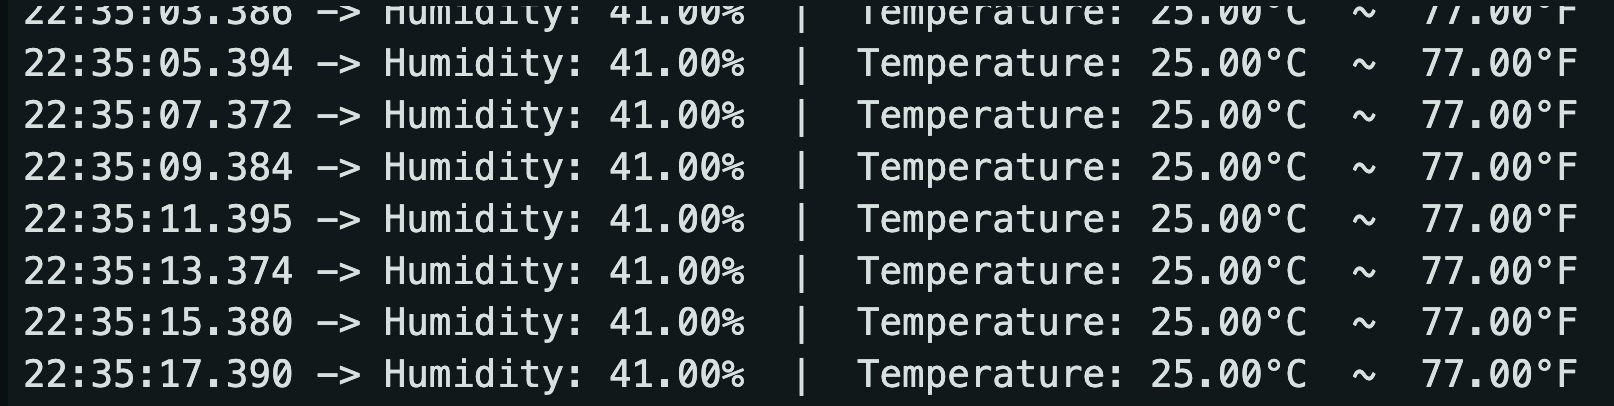
Congratulations! You are now reading data from the DHT11 Sensor in real-time!